
Revelation: I often answer my “what if” questions with a hat. Hats are both simple and complex—simple in that they knit up quickly and have straightforward construction, complex in that they require decreases and (for me at least) a pattern that can be worked in the round. And, yes, there are a great many people in this world with a great variety of head sizes, so I know any hat I knit will be perfect for someone. It’s all just a matter of match-making. (“Rosy soy-wool blend seeks 21″ head for cozy walks on the beach, morning coffee on the deck, and kayaking on Elkhorn Slough…”)
When I was knitting lots of scarves, I enjoyed stitches that produced a distinctive, attractive look on both sides of the work. Now I’m starting to ask “what if” questions about adapting such stitches to hats. Behold my first result:
It’s knots!
Presto change-o! It’s ribs!

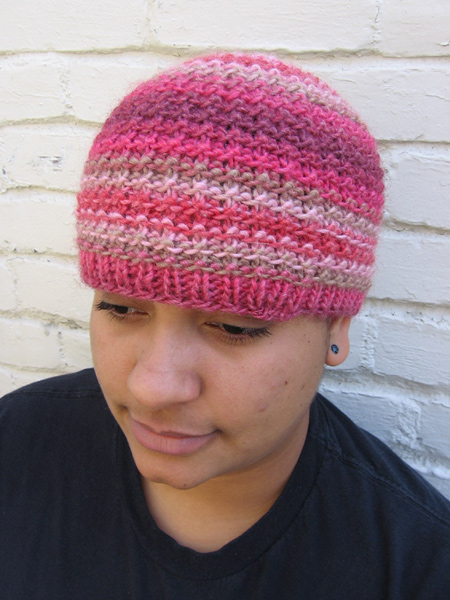
[Our model is the fabulous Christina, friend of Melissa, barrista extraordinaire, and all-around credit to the sisterhood. I don’t know if she will take the hat kayaking, but she was happy to receive it as payment for modeling, and will no doubt show it many a lovely and interesting time.]
Want to see it again? Voila!
Knots:
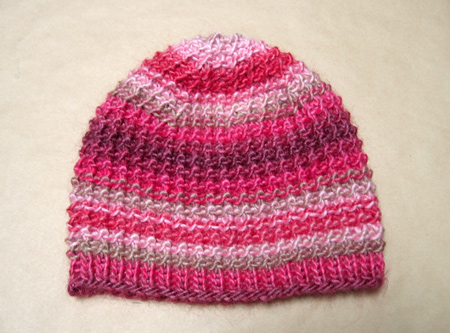
Ribs:

And you can have a hat just like this. Simply follow these easy steps…
Choose one skein (at least 110 yards) of heavy worsted weight yarn. I used Patons’ Soy Wool Stripes, available at both posh yarn outlets and crafting chain stores.
Cast on 80 stitches using 16″ U.S. 10.5 needles.
Work in K1, P1 rib for an inch or so.
Then, work in this two row pattern stitch until total length is about 5-5.5 inches.
Odds: P around
Evens: K1, P1 around
Continue working in pattern stitch, decreasing every odd row as follows:
Decrease 1: P8, P2tog around
Decrease 2: P7, P2tog around
etc, until
Final Decrease: P2tog around
Weave your ends in carefully and trim. I used a bit of matching sewing thread and a needle to tack the ends in place, both for the sake of neatness and to prevent unravelling.
Then, try it on, admire yourself, decide which side you’ll be displaying today, go get yourself a well-earned cup of coffee, and wait for the compliments to start rolling in.